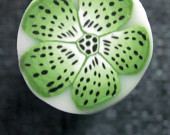
Our next challenge, caning, is generating a lot of buzz on our members' discussion forum. It is great to see seasoned caning pros helping the novices get ready for the challenge. That spirit of community is at the heart of PCAGOE membership.
Here is a sneak peek at some of the conversation. This advice is from member Linda from NKDesigns. Stop back on Wednesday to see a free flower cane tutorial by Linda.
So what exactly is a cane? The Three Ps!
A cane is a log or cylinder of clay that has a design running through it, so each slice of the cane contains the design. When trying to describe what exactly a cane is to a novice clayer, those holiday cookies come to mind - the slice and bake cookies from the grocer’s freezer. Caning with polymer clay is an art form in and of itself. Manipulating different colors, shapes and sizes of clay to form geometric, landscapes, faces, quilt patterns and flowers (and many more subjects) is what caning is all about. Caning is a technique originally used in glassmaking and adapted to our medium of polymer clay.There are three main brands of clay used for caning in the United States, Kato, Premo, Fimo, and Sculpey. Each brand has different properties; Kato being the choice for many caners. Other people prefer Premo, Fimo, and Sculpey or a combination of the clays.
The cane can be round, square, triangular, or any other regular shape. There are complicated canes such as kaleidoscope and more simple types such as a bullseye cane. Making a cane usually begins with a Skinner blend. The clay is then manipulated into a design, cut into pieces and reassembled. For example, petals of a flower around a center stem.
To make a cane, you combine sheets and long snakes of clay in a pattern that will be revealed when you slice the cane. You can use any combination of colors and patterns; you can even use small canes as part of your design, combining them into larger canes.
Once a cane is created, the next step is to reduce or lengthen the cane to make the design different sizes. This is accomplished by squeezing the middle of the cane in a type of “dog bone” shape and gently extending both sides of the cane to the needed sizes. Most canes are never rolled since the design inside the cane has a tendency to distort. Resting the reduced cane for several hours or even days helps with slicing. Thin slices, using a tissue blade (the kind a pathologist might use) are taken from the cane and applied onto a base – be it a pendant, bead, structure, etc. The edges of the slice are then smoothed down and it’s ready to be fired.
Canes should be wrapped with waxed paper or plastic wrap for storage. They should be kept clean and dry for maximum usage.
Making a cane can be intimidating for a new clayer, but with practice, patience and persistence, it is one of the most rewarding aspects of our medium.


No comments:
Post a Comment